
Have pants (or skirts) that are a bit too long? Do you need to know how to shorten salawar (aka: harem pants or pantaloons)? Here a handy DIY guide to our 3 most often used methods for shortening any of our Salawar (Vintage Sari, Silky, Sheer, and Jaipur). These methods can also be used to shorten any of our skirts, as well!
Choose the method below that best matches your needs and sewing skills. Method 1 is best for temporary adjustments to length and for those who do not sew. If you are a busy dancer who can sew but doesn’t have a lot of time Method 2 is great for you. Method 3 is best for those who sew and have the time (and patience to use a seam ripper 🙂 ).
Note: Altered items cannot be exchanged or returned, so, only proceed with altering your garment if you are sure you love it and plan to keep it.
How To Shorten Salawar Method 1:
“I Don’t Sew, I Do The Roll”
By far, the most simple method. Many dancers I know use this for quick length adjustments. Great for borrowed pants and skirts when you don’t want to permanently alter the length. Also helpful for those who don’t (or just don’t want to) sew.

Supplies:
-Your Pants (Or Skirt).
1) Roll The Waistband
Do this multiple times, if needed. That’s it.
Tip 1: The roll stays in place best if rolled from inside to outside.
Tip 2: If you have some bulk at the waist you can often minimize it by strategically placing a snugly wrapped hip scarf over the waist and hips or with a skirt (especially if the skirt is tucked in one of the fun ways shown on our skirt tucking page).
How To Shorten Salawar Method 2:
“I Sew, But, Don’t Have A Lot Of Time”
Quickest sewing method for busy dancers to more permanently shorten salawar or skirts!
Supplies:
-Your Pants (Or Skirt)
-A Sewing Machine
-Matching Thread
-Scissors
-Pins
-Tape Measure
-Iron
1) Determine Your Ideal Length:
The best way to do this is to put the pants on and hold them up high enough to get the length to where you want it. Any of the Salawar that is above where you would want the top of the waistband is how much you’ll need to shorten it. Tie the ankle ties first before trying to determine length.
Tip 1: I like the pants to billow just a little bit on the top of my foot so that when I am dancing they hide the ankle casing, but are short enough so that I don’t trip in the bulk of the fabric.
Tip 2: It may be helpful to have an experienced fellow dancer or your teacher sit in front of you to help you determine the right length. Since they will be viewing these from the audience’s perspective they should be able to make sure you aren’t making them too short or too long.
For this example I determined I would need to shorten it by 3″. You’ll need to adjust the numbers in the instructions below up or down depending on how much length you’ll need to remove (unless it’s the same as this example, of course).
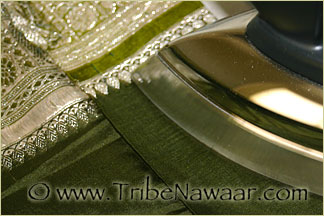
 2) Prep For Your First Stitch:
(We’ll be doing a ‘French Seam’)
On the RIGHT SIDE of the fabric just below the waistband casing: fold the fabric to HALF of the total length you want to shorten them. For these I wanted to shorten them by a total of 3″ so I folded the fabric to 1 1/2″. Pin fold in place.
Tip: I think it is easier to take the extra few minutes to iron the fold in place before I pin it, but, this could be optional.
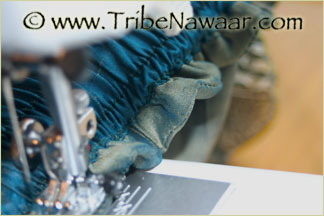
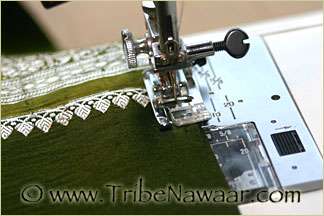
 3) Sew Your First Stitch:
On the RIGHT SIDE of the fabric stitch 3/8″- 1/2″ from the bottom edge of the waistband casing. (For my example I stitched 3/8″ away from the bottom edge of the casing which left 1 1/8″ from the FOLDED edge). This step will allow just enough room for the french seam when you do the next stitch.
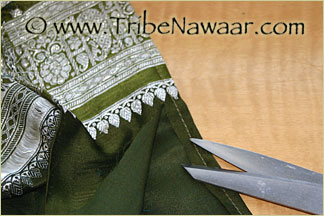
 4) Remove Excess Fabric:
Cut off excess fabric, leaving 3/16″ edge.
Tip: Try to keep cut edge neat and consistent in width. This will help reduce the chance of any loose threads when you get to the final step.
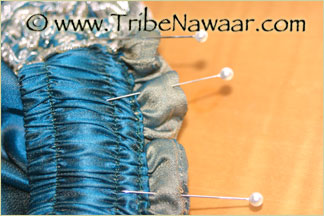 5) Prep For French Seam:
On the WRONG SIDE of the fabric (the inside of the pants), fold over the seam you just made on the outside of the pants. Fold and press so that the stitch is the fold line. Pin to hold fold in place.
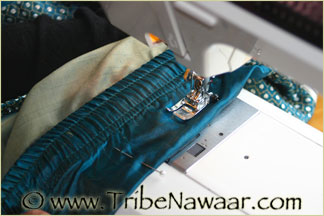
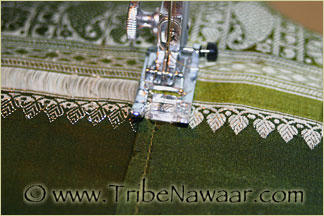
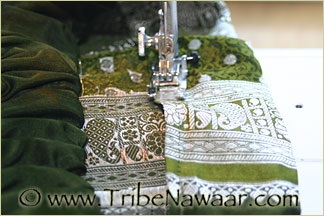
6) Sew French Seam:
On the WRONG SIDE of the fabric, stitch just below the waistband casing. Stretch the elastic fully taut as you are sewing.
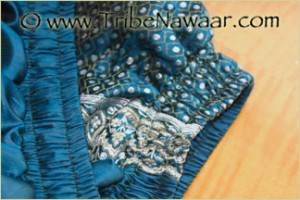
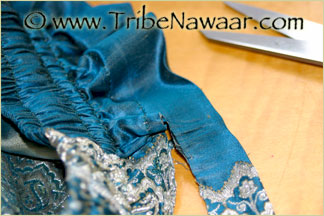
The Finished Look
If you have any loose threads peaking out from your french seam, gently pull and trim those with scissors being careful not to cut the fabric.
How To Shorten Salawar Method 3:
“I Am A Professional And Want My Costuming To Reflect That”
When you have the time and the skills, this is the method for you!
Supplies:
-Your Pants (Or Skirt)
-A Sewing Machine
-Matching Thread
-Scissors
-Pins
-Seam Ripper
-Tape Measure
-Iron
-1 1/4″ Wide Non Rolling Elastic. You’ll need enough to fit around your waist/hip area plus 1- 2″ for overlapping.
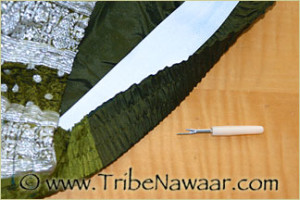
1) Undo The Old Waistband:
Use a seam ripper to remove all of the stitching in the old waistband.
 2) Determine Your Ideal Length:
Once the elastic is removed and you have a large, loose waisted pant, put them ‘on’ and tie the ankles. Once you have the pants at the right length, on the RIGHT SIDE of the fabric fold the extra fabric down at the waist until you have a fold line where the top of your pant’s elastic waistband will be.
Tip 1: I like the pants to billow just a little bit on the top of my foot so that when I am dancing they hide the ankle casing, but are short enough so that I don’t trip in the bulk of the fabric.
Tip 2: It may be helpful to have an experienced fellow dancer or your teacher sit in front of you to help you determine the right length. Since they will be viewing these from the audience’s perspective they should be able to make sure you aren’t making them too short or too long.
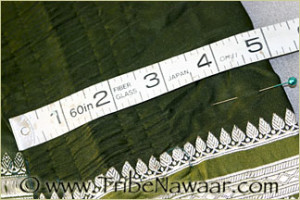
 3) Unpin, Refold & Press:
Now you will want to refold the fabric to 3 1/2″ from the edge on the RIGHT SIDE of the fabric. This will leave you the extra fabric needed to create the elastic casing and the edge finishing. If the amount you are shortening is different than my example use this formula to determine your fold line: total excess fabric subtract 1 1/2″ (in my case 5″ – 1 1/2″ = 3 1/2″). That’s the most complicated the math will be, promise.
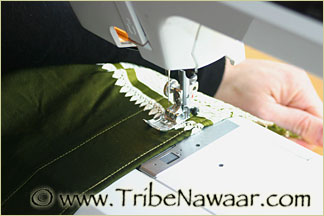
4) Make Your First Stitch:
On the RIGHT SIDE of the fabric, stitch 1/4″ from the folded edge.
5) Cut Off Excess Fabric
Carefully trim off excess fabric on inside edge leaving about a 1/4″ from your stitch line.
 6) Fold & Stitch The Casing
Fold the RIGHT SIDE of the fabric over so that you create a 1 1/2″ space from the outer folded edge to the folded edge that you just stitched. Stitch right over the top of the last stitch you just made. This will create the casing for your elastic. Leave a 2″ section unstitched so that you will be able to slide your new elastic into the new casing you’ve just created.

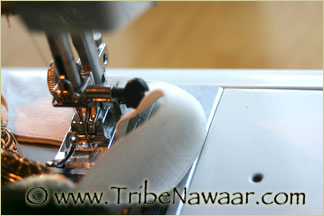
7) Fish The Elastic Into The Casing
Pin a safety pin to the leading edge of your elastic and feed this end into the opening. Pin the following end leaving a 2″ tail so that it doesn’t pull through the opening. Roll cursor over image to see elastic being fished into the casing.
Tip: Use a good quality safety pin. A flimsy safety pin could open up during this step & make your project more difficult.
 8) Adjust The Elastic
Once the leader end of the elastic is fished all the way thru the casing, overlap the two ends of the elastic by about an 1″ and pin them together. Try them on for comfort. Adjust as needed. When the fit of the elastic is right, stitch the elastic together and remove any pins. Allow the elastic to settle into the casing.
Tip: Make sure your elastic hasn’t rolled or twisted in the casing before you make your adjustments.
9) Close The Casing
Pull the unstitched casing section flat. Stitch this closed.
 10) Create A Casing For The Tie
Pull the elastic taut (you’ll want the elastic to be pulled equally all around so that the fabric and the elastic create a smooth flat surface). Make your first stitch on the RIGHT SIDE of the fabric about 1/4″ from the top edge of the casing. Repeat this process and make a second stitch about 3/4″ from the top edge of the casing (or 1/2″ from the last stitch you just created.. both will put this stitch in the correct location).
Tip: Keep the elastic and and fabric as equally pulled as possible to help reduce bunching.
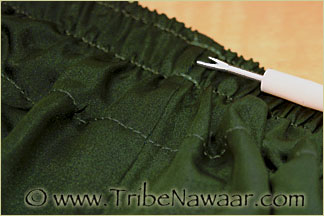
10) Fish The Tie Into The Casing
Using a seam ripper carefully open the front seam on the outside of the pants between the 2 top stitches. This is for the tie. Just as you did for the elastic you will attach a safety pin to the leader end of the tie and fish it thru the opening in the casing you just created.
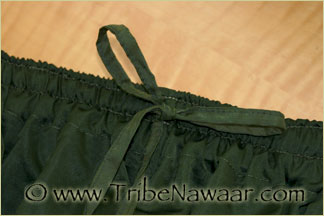
The Finished Look
I hope you find these methods useful! Happy dancing!
~Jennifer
Text & images © 2002- 2021 Tribe Nawaar, Content written by Jennifer Secrist Goran of Tribe Nawaar. If found elsewhere, either in pieces or in entirety, it has been stolen from our site.